Maintaining your motorcycle’s chain is a task that often gets overlooked, yet it plays a crucial role in your bike’s performance and longevity. A properly cleaned and well-lubricated motorcycle chain can make all the difference in your riding experience. Whether you’re a seasoned rider or just starting out, understanding how to properly clean and lube your motorcycle chain is a fundamental skill every motorcyclist should have in their arsenal.
In this comprehensive guide, we’ll take you through the step-by-step process of cleaning and lubricating your motorcycle chain. We’ll also delve into why this maintenance task is so vital and the numerous benefits it brings. From improved performance to a longer chain life, you’ll discover how a little care and attention can go a long way in ensuring your motorcycle runs smoothly and safely.
So, gear up and get ready to dive into the world of motorcycle chain maintenance. By the end of this article, you’ll not only know how to keep your chain in prime condition but also gain a deeper appreciation for the importance of this often underestimated component of your beloved two-wheeler. Let’s roll!

Gathering the Necessary Tools and Materials
Before you embark on the journey of cleaning and lubing your motorcycle chain, it’s essential to ensure you have all the necessary tools and materials at your disposal. Being well-prepared not only makes the process smoother but also ensures your safety throughout. Here’s a list of what you’ll need:
Tools:
- Chain Brush — An essential tool for scrubbing away grime and debris from the chain links.
- Chain Cleaning Tool (Optional) — While not mandatory, this tool can make the cleaning process more efficient.
- Rag or Microfiber Cloth — For wiping and drying the chain.
- Motorcycle Stand — To elevate the rear wheel, making it easier to access the chain.
- Safety Gear — Always wear gloves and eye protection to shield yourself from dirt, cleaning agents, and any potential splatter.
Materials:
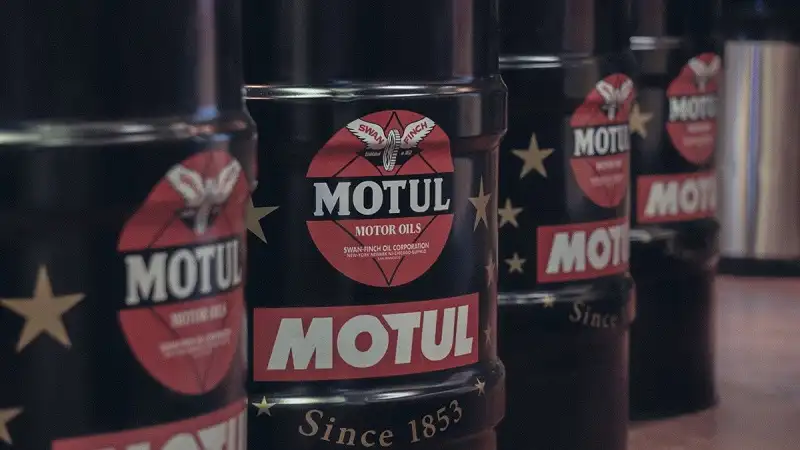
- Chain Cleaner — Invest in a good quality motorcycle chain cleaner. Motul chain cleaners offer break down any old oil, dirt and contaminants with ease.
- Chain Lubricant — Choose a high-quality motorcycle chain lubricant like our Motul MC Care series. We offer the C2 chain cleaner for road bikes, C3 for dirt bikes and C4 for performance applications.
- Degreaser (Optional) — If your chain is excessively dirty or greasy, you may need a degreaser to break down stubborn grime.
- Brush — A small brush for cleaning hard-to-reach areas, such as sprockets and chain guides.
- Container or Plastic Bag — To catch excess cleaning solution and prevent it from splattering on other parts of your motorcycle.
- Torque Wrench (Optional) — If you need to adjust chain tension or remove the rear wheel for cleaning, a torque wrench is handy for proper reassembly.
By having these tools and materials on hand, you’ll be well-prepared to tackle the task of cleaning and lubing your motorcycle chain efficiently and effectively. Now that you’re ready let’s move on to preparing your motorcycle for the maintenance process.
Preparing Your Motorcycle
Before you get your hands dirty cleaning and lubing the motorcycle chain, it’s essential to take a few precautions and prepare your bike properly. This not only ensures your safety but also makes the entire process more manageable. Here’s what you should do:
- Safety Gear — As mentioned earlier, safety first. Ensure you are wearing appropriate safety gear, including gloves and eye protection. Motorcycle chain maintenance can be messy, and you want to protect yourself from any splatter or debris.
- Park on Level Ground — Choose a flat, level surface to park your motorcycle. This will help ensure stability while you work on the chain.
- Turn Off the Engine — Make sure the motorcycle’s engine is turned off. This prevents any accidental engagement of the chain or rear wheel while you’re cleaning or lubing.
- Allow the Bike to Cool — If you’ve recently been riding, give the motorcycle some time to cool down. A hot chain can be uncomfortable to touch and may not respond as well to cleaning and lubrication.
- Elevate the Rear Wheel — If you have a motorcycle stand, use it to elevate the rear wheel slightly off the ground. This makes it easier to access the entire chain, ensuring a thorough cleaning and lubrication.
- Position the Bike Safely — Ensure that your motorcycle is securely positioned on the stand or kickstand. You don’t want it to topple over while you’re working on the chain.
- Check for Chain Guards — Some motorcycles have chain guards or covers. If yours does, remove or open them to access the chain.
- Inspect for Loose Clothing or Obstructions — Ensure there are no loose clothing, shoelaces, or any other obstructions near the chain area. Loose items can get caught in the chain, posing a safety risk.
- Secure the Front Brake — To prevent the motorcycle from rolling forward while you’re working on the rear wheel, consider using the front brake or a wheel chock if available.
Taking these precautionary steps will help you set up a safe and stable environment for cleaning and lubing your motorcycle chain. With your bike prepared, you can now move on to the crucial step of cleaning the chain, which we’ll cover in the next section.
Cleaning the Motorcycle Chain
Cleaning your motorcycle chain is the first and arguably the most crucial step in the maintenance process. A clean chain not only functions better but also allows for more effective lubrication. Here’s a step-by-step guide on how to clean your motorcycle chain:
- Removing Debris and Dirt — Start by inspecting the chain for any loose debris, dirt, or grime. Use a soft brush or cloth to remove any loose particles. Be gentle to avoid scratching the chain.
- Choosing an Appropriate Chain Cleaner — Select a high-quality chain cleaner or degreaser. Ensure it’s suitable for motorcycle chains and follow the manufacturer’s instructions for use.
- Brushing and Scrubbing the Chain — Apply the chain cleaner evenly to the chain, focusing on one section at a time. Use a chain brush to scrub the chain’s links, rollers, and sprockets. Work the cleaner into the chain to loosen and remove stubborn grime. Pay special attention to areas with heavy buildup, like the rear sprocket and the area around the countershaft sprocket.
- Using a Chain Cleaning Tool (Optional) — If you have a chain cleaning tool, this is an excellent time to use it. These tools typically consist of a housing that holds the cleaning solution and brushes that scrub the chain as you pedal the wheel.
- Rinsing and Drying the Chain — After scrubbing the entire chain, rinse it thoroughly with water to remove the cleaner and dislodged grime. You can use a gentle stream of water from a hose or a spray bottle with clean water. Use a clean, dry cloth or compressed air to dry the chain completely. Ensure there’s no moisture left, as water and lubricant don’t mix well.
By the end of this process, your motorcycle chain should be free from dirt, grime, and old lubricant, providing a clean surface for the next step: lubrication. But before we move on to that, it’s essential to inspect the chain for any signs of wear or damage, which we’ll cover in the next section.
Inspecting the Chain

Before proceeding with lubrication, take a moment to inspect your motorcycle chain closely. This step is vital as it allows you to identify any potential issues or wear and tear that might require attention. Here’s how to perform a thorough chain inspection:
Clean Surface
Ensure the chain is clean, as we discussed in the previous section. A clean chain makes it easier to spot potential problems.
Tension and Alignment
- Check the chain’s tension and alignment. The chain should have just the right amount of slack, as specified in your motorcycle’s manual. Too loose or too tight a chain can lead to poor performance and accelerated wear.
- Examine the alignment of the chain. It should run in a straight line between the front and rear sprockets. Misalignment can cause excessive wear on both the chain and sprockets.
Chain Links
Inspect the individual chain links for any signs of damage or wear. Look for:
- Rust — Surface rust is normal, but excessive rust or corrosion can weaken the chain.
- Kinks — A kinked link indicates a potential weak point in the chain.
- Cracks — Cracks in the side plates or rollers are a serious concern and warrant immediate attention.
- O-Rings or X-Rings — If your chain is equipped with them, check for damage or wear on the seals.
Sprockets
Examine the front and rear sprockets for wear. Look for signs of sharp, hooked, or worn teeth. Worn sprockets can cause premature chain wear.
Lubrication Residue
Check for any remaining residue from previous lubrication. Ensure the chain is clean and free from old lubricant, as this can hinder the effectiveness of the new lubrication.
Record Findings
It’s a good practice to record your findings. Note any issues or areas that need attention. This will help you keep track of your chain’s condition over time and plan for any necessary maintenance or replacements.
If you notice any significant problems during the inspection, such as excessive wear, damaged links, or misalignment, it’s crucial to address these issues before proceeding with lubrication. In most cases, a worn-out or damaged chain or sprockets will need to be replaced to ensure safe and optimal motorcycle performance. Once you’ve completed the inspection and addressed any issues, you can move on to the next step: lubricating the motorcycle chain.
Lubricating the Motorcycle Chain

Lubricating your motorcycle chain is the final step in ensuring it runs smoothly, quietly, and efficiently. Proper lubrication not only reduces friction and wear but also helps protect against corrosion. Here’s a step-by-step guide on how to lubricate your motorcycle chain effectively:
Choose the Right Lubricant
Select a high-quality motorcycle chain lubricant that matches your riding conditions and preferences. All of Motul chain lubricants deliver top tier performance and ease of use. With Motul chain lubricants, you are giving your bike the best care available.
Position Your Motorcycle
Ensure your motorcycle is still securely positioned on the stand or kickstand, as you did during the cleaning process. This provides a stable platform for lubrication.
Apply Lubricant
Shake the chain lubricant canister well to mix the contents thoroughly. While rotating the rear wheel, evenly apply the lubricant to the inner side of the lower chain run, aiming for the gaps between the links. Avoid over-lubricating, as excess lubricant can attract dirt and create a messy buildup.
Rotate the Wheel
To distribute the lubricant evenly, slowly rotate the rear wheel a few times while continuing to apply the lubricant. This ensures that the lubricant penetrates the chain’s rollers and pins.
Wipe Off Excess Lubricant
After applying the lubricant, use a clean, dry cloth to wipe off any excess. Pay attention to the outer side of the chain to prevent flinging excess lubricant onto other parts of your motorcycle.
Let It Set
Allow the lubricant to set for a few minutes. This allows it to penetrate and adhere to the chain surfaces effectively.
Recheck Tension and Alignment
Once the lubricant has set, recheck the chain tension and alignment to ensure they are still within the manufacturer’s specifications. Make any necessary adjustments.
Test the Chain
Take your motorcycle for a short ride to help the lubricant distribute further along the chain. Ensure that the chain runs smoothly and quietly.
Reassembling and Testing
Now that you’ve successfully cleaned and lubricated your motorcycle chain, it’s time to reassemble any parts that were removed during the process and conduct a few tests to ensure everything is in proper working order. Follow these steps:
Reassemble Removed Parts
If you removed any parts like chain guards or covers, ensure they are properly reattached. Secure them according to your motorcycle’s specifications.
Check Chain Tension and Alignment Again
Recheck the chain’s tension and alignment. Make any final adjustments if needed, as proper tension and alignment are critical for safe and efficient operation.
Torque Bolts and Fasteners
If you removed the rear wheel or any other components for cleaning and maintenance, ensure all bolts and fasteners are properly torqued to the manufacturer’s specifications. A torque wrench can be handy for this task.
Test the Rear Wheel
Spin the rear wheel to ensure it rotates freely without any unusual noises or resistance. Check for any signs of rubbing or misalignment.
Test Ride
Take your motorcycle for a brief test ride in a safe and open area. Pay attention to how the chain feels and sounds. It should operate quietly and smoothly. Test the throttle response to ensure there’s no undue hesitation or irregularities.
Observe for Leaks
After the test ride, inspect the chain, sprockets, and the area around the countershaft sprocket for any signs of lubricant leaks or excess lubricant fling. Address any issues if you find them.
Final Inspection
Conduct a final visual inspection of the chain to ensure it’s clean, properly lubricated, and free from any issues.
Following these steps means that you’re not only ensuring that your motorcycle chain is in excellent condition but also that all components are reassembled correctly and your motorcycle is safe to ride. Proper maintenance and testing can go a long way in preventing unexpected issues on the road.
Keep Your Chain Lubed with Motul Chain Lubricants
Congratulations! You’ve successfully learned how to properly clean and lube your motorcycle chain. By following the steps outlined in this guide and implementing the maintenance tips, you’ve taken a significant step towards ensuring your motorcycle runs smoothly and efficiently.
Maintaining your chain isn’t just about extending its lifespan; it’s also about enhancing your riding experience. A well-maintained chain not only reduces the risk of breakdowns but also contributes to better performance and a quieter, more enjoyable ride. That’s why many riders out there choose Motul motorcycle care products. Our product offers great performance, ease of use and durability. Keep your chain silent and reliable with Motul!